Category Archives: DIY

Thursday, September 5, 2013

Design Styling Stairwell Gallery Wall Photos

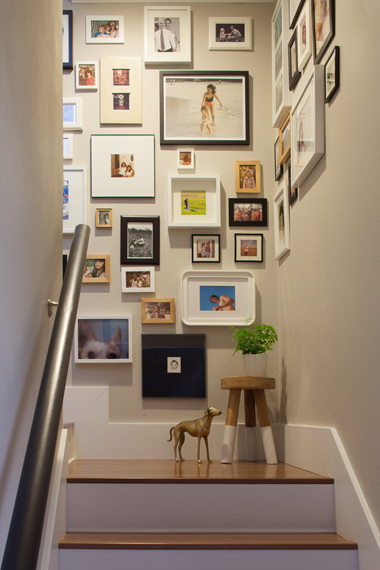
I’ve never been a huge fan of personal photos scattered throughout the home. I think it’s because the tendency is to use photos that, even though they were taken on a special day, may not be the best photo compositionally. Add to that the fact that they’re usually framed haphazardly and propped all over the house, and the photos just read as clutter.

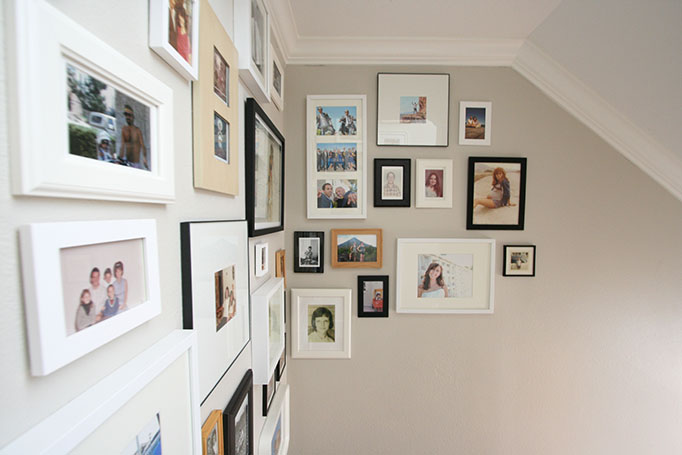
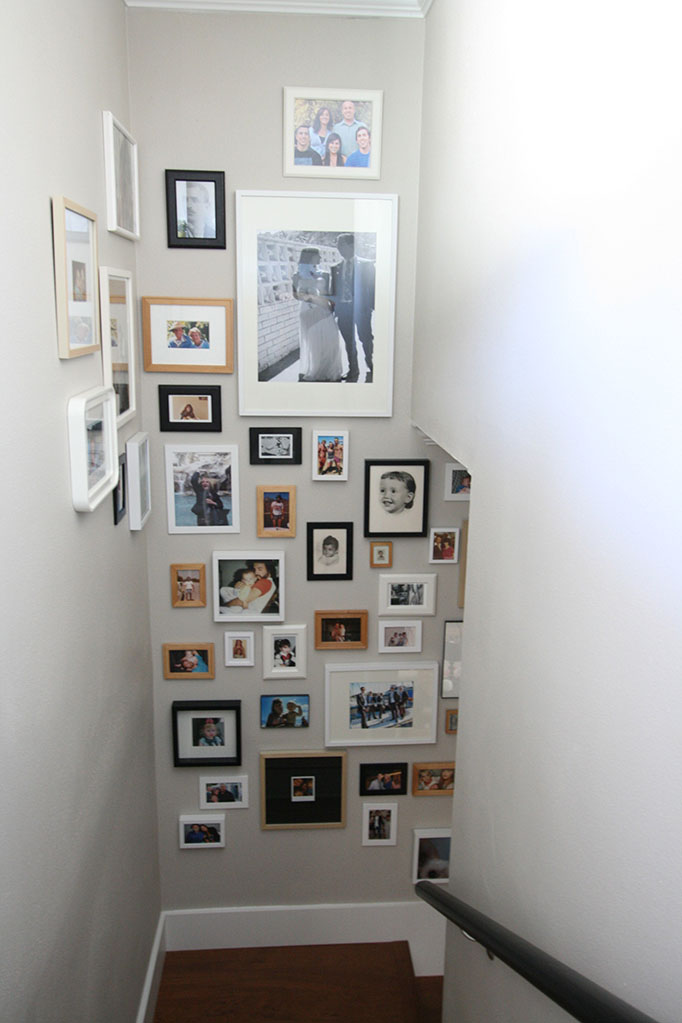
It’s important for me to have family photos in my own home, but I like to approach it a little differently. In the case of our house now, I had a HUGE wall in our stairwell that needed something really dynamic. To fill this wall with art could have gotten expensive. To hang only a couple pieces on it would look anemic. So I decided this was the perfect spot for a gallery wall of family photos. I started by gathering a ton of photos of my husband’s family that my mother-in-law had. Then I dug through all the photo albums my mom had so meticulously kept over the years. I was looking for photos from special occasions, sure, but more importantly I was looking for photos that were special in and of themselves. Here are a couple examples of what I mean.

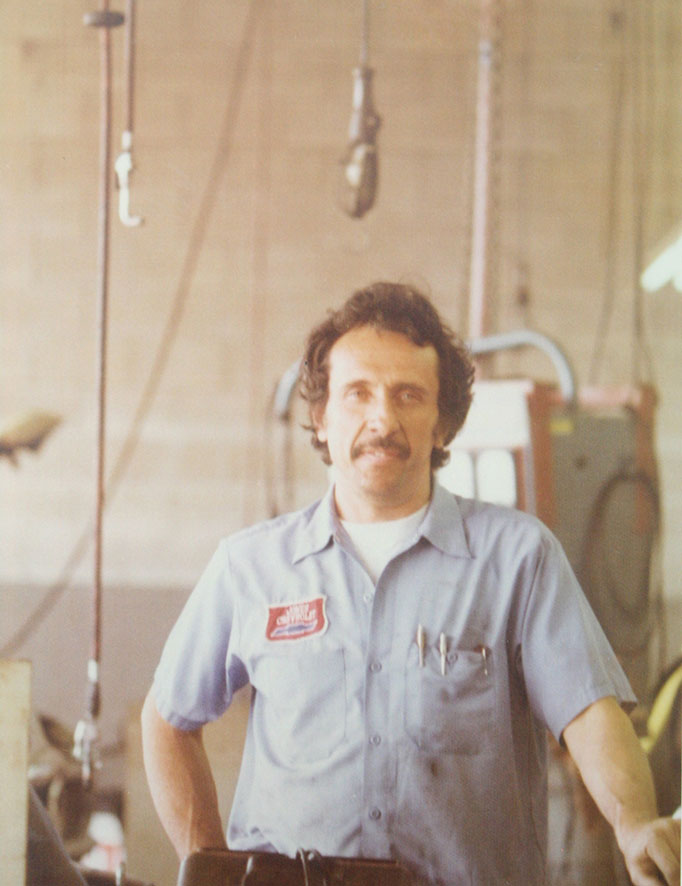
The first is my husband’s grandpa around age forty at work in the auto mechanic shop he owned. I love how the shot is framed, looking slightly up at him with all the equipment in the back. It gives a sense of what an average day would have looked like at that time in his life.

Gallery Wall

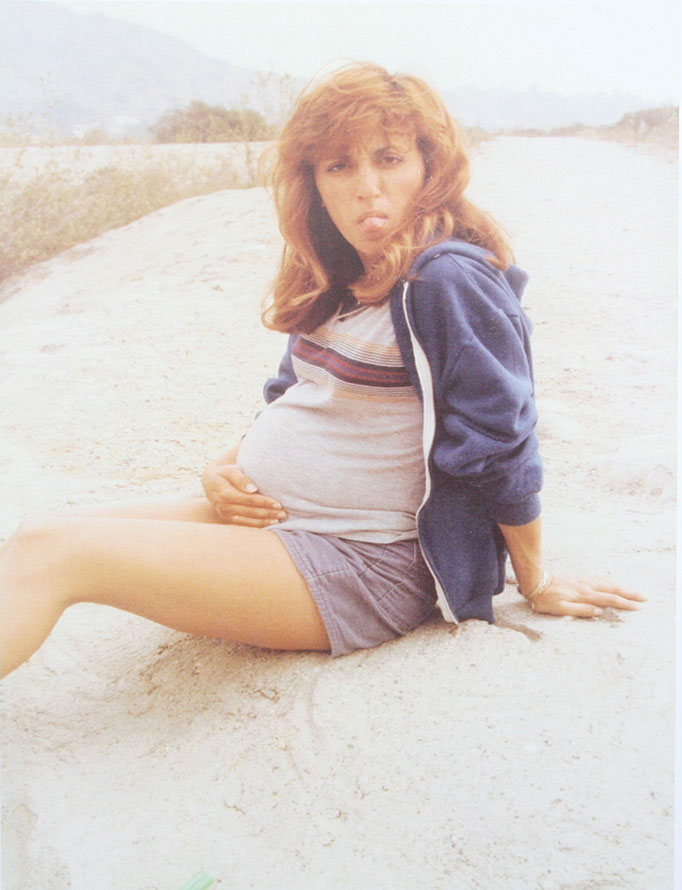
The second is my awesome mother-in-law, pregnant with my husband. I just love the casual, funny, not posed nature of this photo.

Gallery Wall3

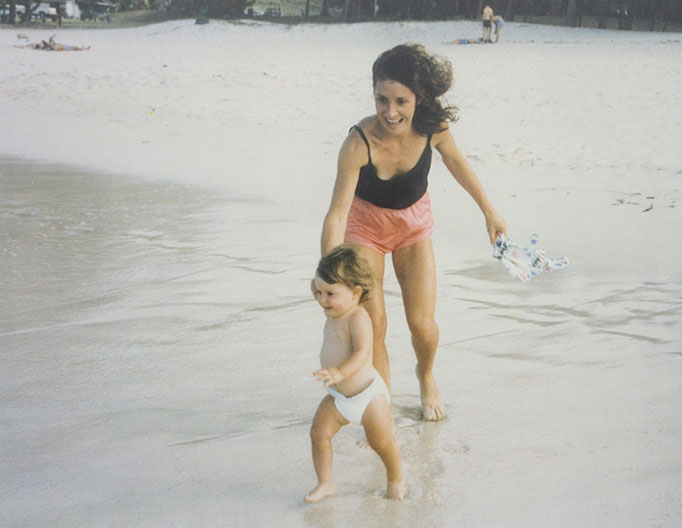
Lastly, is a shot of my mom chasing after a baby me on a beach in Hawaii. My mom just looks so young and happy and beautiful. I love the colors and sense of movement here too.

Gallery Wall2

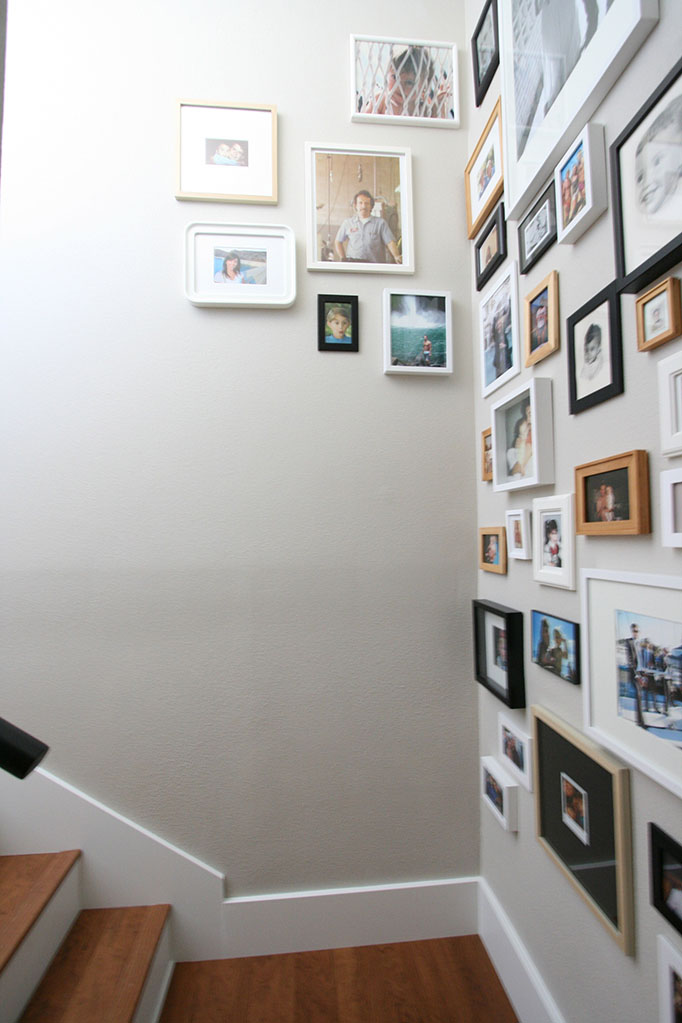
These are just three of the more than 75 (!!) we ended up hanging on the wall. After choosing the photos, we had to resize, frame and compose them. Rather than hanging a million 4×6 photos, we had some blown up large, and some of the very old photos we kept very small, which adds a ton of interest.

We kept the frames super simple because we didn’t want the wall to get too busy and we didn’t want to spend a million dollars. It’s amazing how quickly frames can add up! All the frames are from Ikea, Aaron Brothers and Target. We chose various white, black and birch frames for some variety, while still keeping things cohesive. We started by hanging the large photos first and tried for a pleasing amount of space between them. In other words, we didn’t want to cram all the big ones together and all the small ones together. With the big ones in place, we moved down to the next size and so on until we were filling in gaps with the tiny ones. Another important feature is that we filled the whole wall, from floor to ceiling. Don’t be afraid to be bold with this! I even decided to wrap a few pictures onto the side walls for a more sculptural feel and to help visually lead you up and down the stairs.

Gallery Wall4


Gallery Wall6


GalleryWall 5

As busy as David and I are, and as long as we sometimes go without getting together with our loved ones, it’s nice to still be able to see them every day in this way. Plus, this is something that can totally evolve over time! Whenever we have kids of our own you better believe we’ll be adding and swapping for a long time to come. That’s all part of the fun!

8

Monday, July 29, 2013

Over the weekend I tackled a fun little DIY project in my tiny office.  Right behind my desk I have a big wall that needed some attention.

Cork Board DIY project via Layers and Details

The console you see houses my printer, and below the console I have containers filled with all my stuff for work. But above the console, nothing. Boring! So I decided this would be the pefect spot for a mood board. It’s so helpful for me to have space for a big mood board for when I’m working on clients’ projects or just gathering inspiration for myself. After all was said and done, here’s my wall now!

Cork Board DIY via Layers and Details

It was really easy, so let’s get started! One thing to note is that I used cork tiles rather than a large roll of cork. This was more a “buy now and decide what to do with it later” move than anything else. I just saw the tiles at Target and decided to buy them without a clear idea in mind yet for how I’d use them. In hindsight, a roll of cork would have been way easier to deal with than tiles, so you might want to consider that if you decide to tackle this project! That said, here’s what you’ll need:

Cork (either cork tiles or a roll of cork)
Primer (optional)
Paint colors of your choice (I used two colors – a light pink and a slightly darker pink)
Painters tape
Paint brush
Kraft paper
Small nails
Hammer
Level

Cork Board DIY via Layers and Details

Start by laying out your kraft paper and then lay your cork tiles on top. It helps to use a little rolled piece of painters tape on the back of each tile to stick them to the kraft paper. I went over the tiles with a quick coat of primer just because the cork is so porous and I wanted to make sure my colors went on nicely. The primer doesn’t have to be pretty, just slap it on there. You can skip this step if it’s a little too nit picky for you!

Cork Board DIY via Layers and Details

Once the primer is dry, paint all the tiles with your first color (in my case it was the lighter pink). Let this first coat fully dry (a couple hours). Then tape off your pattern! I just did a simple triangle. Layer on your second color and again, you’ll want to let this coat dry fully. I also found that when it was time to start handling the tiles, it was helpful to take an Exacto or box cutter and cut along the cracks between the tiles to cut through the paint that settled in the cracks. Then the tiles pulled up easliy.

Cork Board DIY via Layers and Details

Then it was time to hang! Going one by one, I hammerd a tiny nail into all four corners of the tiles and used a small level to make sure I was keeping everything staright as I went along. It only took a few minutes to hang the whole thing! At this point you could hit the nail heads with a dab of paint so they blend in.

If you go the route of using a roll of cork, I would suggest you start by hanging the cork on the wall and just paint it right in place! Throw some painters tape on the wall at the edges of the cork so your walls stay protected. You eliminate the Kraft paper step by using the cork roll which is nice (if you tried painting the tiles in place on the wall, paint would get in between the cracks and end up on your wall). I do, however, like the grid pattern the tiles create, so just go with your own preference!

Cork Board DIY via Layers and Details

I love the bold graphic nature of this mood board. I also like that the colors aren’t too intense so it doesn’t take away from the pictures and materials I tack up there. It’s so nice having a spot that is totally dedicated to inspiration!

Cork Board DIY via Layers and Details

9

Wednesday, July 17, 2013

I live right on the coast, and it seems like it’s taken forever for summer to hit. I know it’s been hot just about everywhere lately, but at our house, we’ve had a marine layer and cool breezes keeping temperatures around a very pleasant 75 degrees. The sun has finally been breaking through the last few days though, so I thought I’d share this very summery DIY I did recently.

I found this adorable outdoor dining set at a local vintage shop and had to have it. I think I paid only $150 for the whole set!

Outdoor Patio Table Chairs DIY

 
The upholstery on the seats was not original. Someone else had gotten their DIY hands on it before me, and actually the fabric was pretty cute. It’s just that the colors weren’t really what I wanted, so I decided to go with this awesome Trina Turk fabric instead!

Trina Turk Fabric


This is probably a good time to introduce my executive assistant/ mascot, Jack. This is basically his contribution to all my projects: lay right in the middle of them. He’s the best.

Trina Turk Dog DIY Patio Outdoor Table Chairs


My husband, David provided more helpful assistance by holding everything taught while I stapled. Anyway, I guess this is less a DIY post and more of a before and after, since I don’t think anyone actually needs detailed instruction on measuring seats, ordering fabric and stapling said fabric to said seats. It was that simple!

Trina Turk DIY Patio Outdoor Table Chairs


Trina Turk DIY Outdoor Patio Table Chairs


Trina Turk DIY Outdoor Patio Table Chairs


11

Hi, I’m Samantha Gluck. I am an interior designer and general enthusiast of all things creative, pretty, inspiring and offbeat. This is the world as I see it. Welcome!